
Table of Contents
- Installing a Ductless Mini‑Split on an Interior Wall: A Homeowner’s Guide
- Pre‑Installation Planning and Essential Considerations
- Step 1: Evaluate Your Interior Wall Location and Clearance Requirements
- Step 2: Check Wall Structure and Mounting Surface
- Step 3: Plan the Refrigerant Line and Drain Route
- Step 4: Select the Correct Electrical Circuit and Breaker Size
Installing a Ductless Mini-Split on an Interior Wall: A Homeowner’s Guide
Yes, a ductless mini-split can be installed on an interior wall, but it requires professional planning to route refrigerant lines, drainage, and wiring correctly. If you are wondering whether a ductless mini-split can be installed on an interior wall, this guide covers the essential considerations—from stud placement and condensate removal to line-set access—so you can determine if an interior mount is feasible for your home. With over 25 years serving Culver City homeowners, we have seen firsthand that a clean install is always possible when the right prep is done, but cutting corners leads to drywall damage and drainage trouble later. Before we walk through the actual installation steps, the next critical area to address is the pre-installation planning that every homeowner should complete.
Key Takeaways
- Careful pre-installation planning is critical to the success of an interior-wall ductless mini-split project.
- When planning a ductless mini split installation in your Culver City home, the first step is to evaluate the interior wall location.
- A dúctless mini split can be installed on an interior wall if the wall structure supports it properly.
- A smart route for the refrigerant lines and drain protects your mini-split’s compressor and maintains proper humidity control.
- Once the route for the refrigerant line and drain is determined, the next important step is to identify the correct electrical circuit and breaker size.
Pre-Installation Planning and Essential Considerations
Careful pre-installation planning is critical to the success of an interior-wall ductless mini-split project. Homeowners should investigate the wall’s structure, the unit’s clearance needs, and the pathways for refrigerant lines and drainage before any equipment is ordered. This will help to identify any issues prior to the unit arrival and help ensure the unit will be installed quietly and efficiently.
Installing a mini-split on an interior wall creates more challenges. The wall must be able to support the indoor unit. Use a stud finder to locate wall studs so the indoor unit can be secured. There must also be clearance on all sides of the indoor unit for good air flow and for access for service and maintenance. Because the unit sits on an interior wall, routing the line set and condensate drain through walls or ceilings requires additional planning; a gravity-drain path or a condensate pump must be considered. Also, the location must be near an electrical circuit to meet the requirements of the manufacturer.
For these reasons, it is a good idea to contact a licensed HVAC contractor early in the process to help you identify challenges that might cause issues. Our highly-trained technicians in Culver City help homeowners in the early planning stages evaluate interior wall options, identify the cleanest line-set routes, and confirm electrical compatibility. This saves time and helps to avoid surprises later. Once the challenges for the line set and electrical circuits have been addressed, you are ready to assess your chosen interior wall and confirm the specific clearances required for the indoor unit.
Step 1: Evaluate Your Interior Wall Location and Clearance Requirements
When planning a ductless mini split installation in your Culver City home, the first step is to evaluate the interior wall location. We at Culver City Heating & Cooling Climate Control always begin by checking clearance requirements. The indoor unit needs adequate space for airflow and service access. We measure from the ceiling: at least 6 to 8 inches of clearance above the unit, and about 4 to 6 inches from side walls or corners. Next, we scan the wall for obstacles. Using a stud finder, we locate studs, electrical wiring, and plumbing hidden behind drywall. This helps avoid damaging infrastructure and confirms the wall can support the unit. After evaluating the location and clearances, the next step is to check the wall surface to confirm it’s suitable for mounting.
Step 2: Check Wall Structure and Mounting Surface
A dúctless mini split can be installed on an interior wall if the wall structure supports it properly. The most critical step is verifying that the mounting surface is level, flat, and strong enough to hold the indoor unit’s weight.
- Run a stud finder across the wall to locate at least two framing studs that line up with the mounting bracket holes. Mark the stud centers so the bracket screws bite securely into solid wood or metal, not just drywall.
- Hold a 4-foot level against the wall. If the wall dips or bows more than about ⅛ inch, the unit may vibrate or pull away over time.
- Scan the wall with a wire-and-pipe detector before drilling. Plumbing vents, electrical cables, or insulation can hide behind the drywall.
Once the wall passes these checks and you’re satisfied it can carry the unit safely, the next step is planning the refrigerant line and drain route.
Step 3: Plan the Refrigerant Line and Drain Route
A smart route for the refrigerant lines and drain protects your mini-split’s compressor and maintains proper humidity control. The shorter the distance between the indoor and outdoor units, the less charge the refrigerant needs. The drain line is sloped to ensure water drains.
- Shortest route: Identify the shortest route between the indoor and outdoor units to minimize line length.
- Avoid sharp bends: Route the copper lines without sharp bends; kinks can restrict refrigerant flow and damage the tubing.
- Insulate: Insulate the line set to prevent condensation and maintain energy efficiency.
- Wall pass-through: Plan the wall hole at a height that matches the indoor unit and allows a smooth transition to the outdoor unit.
- Drain slope: Provide a constant downward slope on the condensate drain line (at least 1% grade) for reliable gravity drainage.
The paths for the line set and drain have been designed, and we can proceed to size the circuit.
Step 4: Select the Correct Electrical Circuit and Breaker Size
Once the route for the refrigerant line and drain is determined, the next important step is to identify the correct electrical circuit and breaker size. The breaker must be in the exact proportions shown on the nameplate of the ductless mini split unit manufacturer. We check that label first because it provides the required voltage and amperage for that unit.
As per local codes, a dedicated circuit for a ductless mini split is typically required. Equipment sharing a circuit with other appliances risks nuisance tripping and can compromise the equipment’s long-term reliability. The breaker size needs to be adequate to protect the circuit from an overload condition and meet the requirements of the unit being connected to it, so verifying both the unit’s requirements and the panel’s available capacity before proceeding is essential.
Although every situation is unique, and therefore we are unable to say for sure, it is most prudent to bring in a licensed electrician to help with local codes. After the correct circuit and breaker size are determined, one can proceed with the wiring. We talk about this in the following step.
Step 5: Run the Electrical Wiring Safely
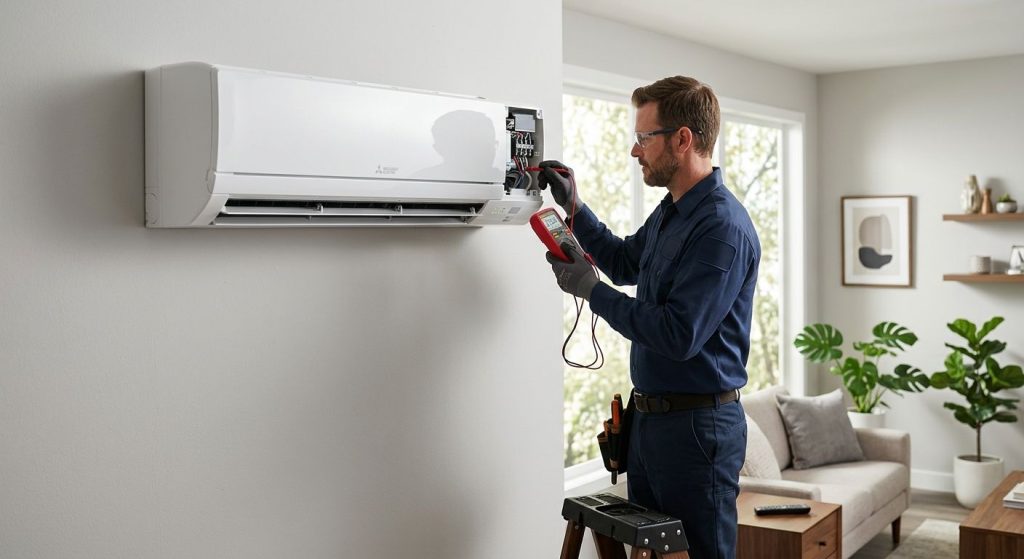
Electrical safety for a ductless mini-split begins with confirming zero voltage (turn off the main or dedicated breaker and test the circuit with a non-contact voltage tester, before you handle any conductor). Gather your tools.
Run the cable from the breaker panel to a disconnect switch, which will be located near the outdoor unit, and from there to the indoor unit. Secure the cable with staples or clamps, and make sure it’s not touching anything sharp. Strip the wires and connect them using wire nuts or terminal blocks (making sure to follow the manufacturer’s recommendations). Tighten the connections and encase any splices in a rated junction box.
Double check all terminals and leave the disconnect switch in the off position. Use a multimeter to check continuity and insulation if you are comfortable doing so. Make sure the disconnect switch is accessible. Only after the complete safety check and ensuring all wiring is correct, can you reenergize the circuit. At this point you can mount the indoor unit, as well as connect the refrigerant lines. If you have any doubts about what you are doing, consult a licensed electrician to ensure a code-compliant result.
Step 6: Mount the Indoor Unit and Connect Refrigerant Lines
We affix the backplate to the wall and make sure it is level and anchor it to studs or heavy-duty drywall anchors. Then, we verify the wall can support the unit’s weight before proceeding, so the mounting plate will not shift.
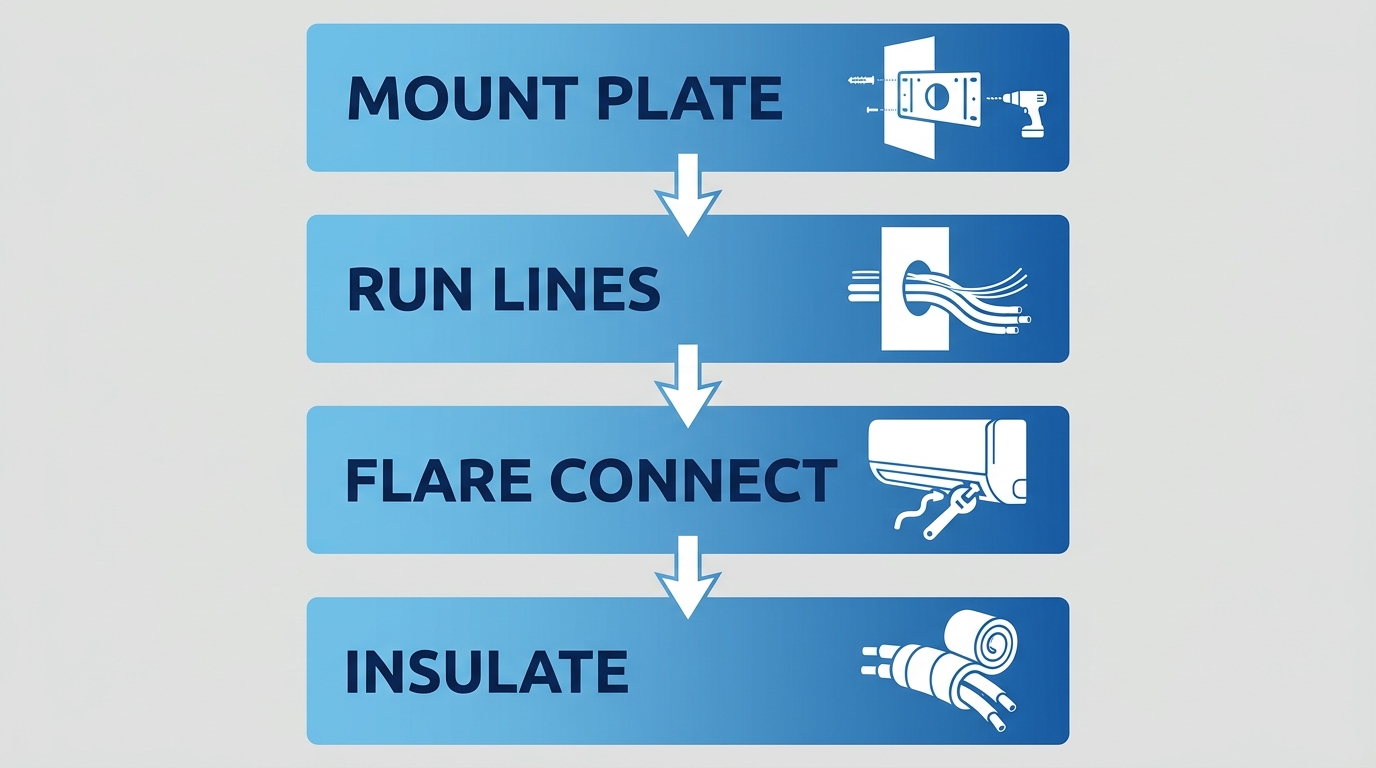
With the wall mounting plate in place, we route the refrigerant line set through the wall penetration, taking care not to kink the copper tubing. To complete the connection, we lift the indoor unit onto the plate, connect the flare fittings, and tighten them evenly to create a leak-proof seal. The seal must be snug, but not over-tightened, as this can damage the flares. After the seal is secure, we cover the lines with closed cell insulation. This foam will keep condensation from forming on the lines and also reduce energy loss.
Step 7: Test System Operation and Verify Performance
Tests after mini-split system installation verify the operation of cooling, heating and draining functions. Check that power is on at the disconnect or breaker. With power on, check the indoor display and remote control for error codes or warning lights. To test cooling, set the thermostat a few degrees below room temperature to initiate cooling cycle. Confirm cool air is blowing from the indoor unit and the outdoor fan is spinning. If the system offers a heating mode, test it and confirm warm air is blowing from the indoor unit. Verify the outdoor unit’s fan and compressor are not rattling or excessively vibrating, and are functioning properly. During cooling, check the condensate drain and verify it is draining. A continuous trickle or a dry line is normal, while pooling or leakage indicates a blockage that requires attention. If any error code appears or the system fails to start, stop and consult the troubleshooting guide for further assistance.
Troubleshooting Common Mounting and Operation Issues
If you’ve been wondering whether a ductless mini split can be installed on an interior wall in your Culver City home, understanding potential issues after installation is essential. Many common mounting and operation problems can be resolved with a few simple checks before a technician is needed.
- Vibration and mounting noise: Rattling often results from improper wall anchoring. Verify that the mounting bracket is securely fastened to wall studs and the indoor unit is level.
- Condensate drainage: Water leaks or drips from the indoor unit usually indicate a blocked drain line. Inspect the condensate hose for kinks or clogs and ensure it has a proper downward slope.
- Airflow obstruction: Furniture or curtains placed too close can block airflow and cause uneven cooling or heating. Maintain at least 12 inches of clearance around the unit.
- Power and remote control issues: If the unit does not turn on, check the circuit breaker and power cord. For an unresponsive remote, replace the batteries. Error codes on the display often point to a dirty air filter—cleaning or replacing it can restore proper operation. If these steps don’t resolve the problem, professional diagnosis is advised.
When basic troubleshooting doesn’t fix the issue, or if you suspect a refrigerant leak or notice damaged electrical connections, it’s time to contact our certified technicians. We can accurately diagnose and repair more complex problems, ensuring your system operates safely and reliably. Should any of our work fall short, we will correct it to your satisfaction.
Frequently Asked Questions
What size breaker do I need to run a mini split?
The breaker size must match the unit’s nameplate specifications for voltage and amperage; a dedicated circuit is typically required. Culver City Heating & Cooling Climate Control advises verifying both the unit’s requirements and the panel’s capacity. Exact sizing is unit-specific, so consulting a licensed electrician ensures code compliance.
Mini split installation instructions
Ductless mini-split installation on an interior wall requires pre-installation planning, evaluation of wall location and clearances, verification of wall structure, planning refrigerant line and drain routes, selecting the correct circuit and breaker size, running electrical wiring safely, mounting the indoor unit, connecting lines, and testing operation. Culver City Heating & Cooling Climate Control provides professional installation services.
How to install mini split electrical wiring
To install mini split electrical wiring, first turn off the breaker and confirm zero voltage, then run cable from the breaker panel to an accessible disconnect switch near the outdoor unit and onward to the indoor unit. Connections must follow manufacturer recommendations, all splices enclosed in rated junction boxes, and a dedicated circuit is required. A licensed electrician should perform the work for safety and code compliance.
Ensuring Long-Term Performance and Next Steps for Your Mini-Split System
Installing a ductless mini-split on an interior wall is a proven choice when manufacturer instructions and local building codes are followed. To sustain that performance, we advise scheduling professional maintenance at least once a year. A comprehensive tune-up includes coil cleaning, refrigerant level checks, condensate drain clearing, and electrical component inspections, each step helps prevent small issues from escalating into expensive repairs. Our certified technicians can often schedule visits; they service all major brands with up-to-date training. Should we make a mistake, we will do everything in our power to correct it to your satisfaction. For personalized advice about your interior-wall installation or to book a maintenance visit, call Culver City Heating & Cooling Climate Control at (424) 543-6788 or contact us online. All trademarks remain the property of their respective owners and are used for identification purposes only, without implying endorsement or affiliation. Copyright 2026 © Culver City Heating & Cooling Climate Control.
Schedule Your Mini-Split Installation
Now that you’ve followed the detailed steps for installing a ductless mini-split on an interior wall, you recognize the importance of precise planning and technical skill. While a DIY approach can be informative, entrusting the job to certified professionals guarantees your system’s safety, efficiency, and compliance with local codes. Our company has been providing expert HVAC services in the Los Angeles area since 1998. Our trained technicians handle every aspect—evaluating wall structure, routing refrigerant lines, completing electrical connections, and testing performance. We back every installation with a commitment to your complete satisfaction; if a problem arises, we’ll do everything in our power to correct it. Call (424) 543-6788 or visit us at 800 Corporate Pointe #10A, Culver City, CA 90230 to book a convenient appointment for your mini-split project. Take the next step toward a comfortable, climate-controlled home with a trusted local partner.